Pages

Thursday 17 January 2013

Valentine's Tattoo Shirt


This one is for the boys!! Obviously you could put this on a girl too..but there is literally hundreds of cute and beautiful things for little girls..and not a whole lot of selection for the little men out there. 

I saw this on pinterest and thought I would give it whirl but as always in my own way! And I LOVE it..and more importantly my son loves it!!

You Will Need:

-Shirt ( I grabbed mine at WM on sale for $4)
-Felt
-No Sew Fabric Glue

This in total cost me $9!! and I have oodles of felt and glue left over for future projects!


Step One:

- Trace out your heart, banner and letters. I sketched mine onto paper first. For the heart and banner I traced it directly onto the felt..The letters drove me insane!! It took a lot of patience to cut them out, but I was happy with the end result.


Step Two-

-Glue your heart first..then banner..lastly letters and OH EM GEE...that is IT! How simple was that!!!

Make one for the little man in your life..simply the cutest!!


Happy Crafting
~Sy


Sunday 6 January 2013

DIY Instagram Magnets


Seem's like everyone is buying stickygrams these days..and they are SO awesome! I am a huge instagram fan myself..and I just about bought some..but I always get the familiar thought.."Can I make it myself?" ...and so it turns out I can! and so can you! Easy , quick and super cute!

What You'll Need:

- Your Favorite Instagrams! I just printed them as an 8x10 at Walmart.

-Mod Podge

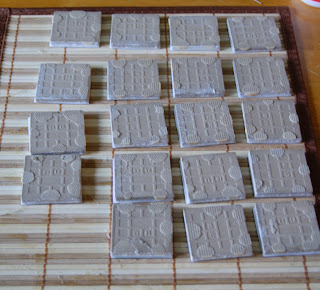
-ceramic tiles (Home Depot, Home Hardware etc...)

- Glue gun (or a strong glue)

-Magnets


Step One: 

-Cut out your pictures, then put a think layer of Mod Podge over the top of the tile. Let sit for about 5 minutes.


Step Two:

-Add Mod Podge to the top of your picture, be sure to get the sides as well to give it a good seal. I did 3 coats per tile and was happy with the effect. Let it dry until clear between coats.


Step Three:

-Flip your tiles over and add your magnets. Let Set.


Viola!! You got yourself some super crafty magnets!!
Happy Crafting
~Sy


Saturday 6 October 2012

Candlelit Halloween Jars


Firstly..it's been a while, and I apologize!! Things have kept me quite busy , but now I'm right back into crafting so be prepared to be seeing a lot of me!! Secondly..I apologize for the quality of pictures, I misplaced my camera battery charger..and was too impatient to look for it, but wanted to tutorial this!

So with Halloween right around the corner, how cute are these!! The really add the the ambiance of any room, and I am just in love with them :)

Skill Level: Easy!! My five year old joined in on this one!


You Will Need: 

- Acrylic Paint
- Paint Brushes
- Glass Jars
- Tea lights


Step One:
Paint your jar!! I did about three coats. 


Step Two:

Next paint the rims black


Step Three:

Draw your face, then paint it in!


Pop in a tea light and voila! 


And because my son tried so very hard, I'll post his as well. There is something very sweet about his Halloween jars. I can definitely see us using them for many years to come.


Happy Halloween & Happy Crafting!
~Sy


Friday 27 April 2012

Sweet Felt Owls ♥

These sweet little owls are not only easy to make, but they are sure to melt your heart! I have mine sitting up on my dresser and I love seeing them everyday! My five year old also loved making one, and he had a lot of fun with it. 

Skill Level: VERY easy!! ( For my child, I let him pick his colors etc, but cut out the pieces and let him use white glue.)

You Will Need:

• Styrofoam Balls ( Big or little)
•Different colors of felt
•Googly Eyes
• Hot or White glue
•Sharp Scissors


Step One:

•Cut out a circle of felt and glue it to your ball. This will be the bottom/base of your owl
.


Step Two:

• Choose your felt for your tummy feathers. Cut out in feather shape. ( think tear drop or leaf) I'd say 15 or so. You can always use more if you need to.

•Begin by gluing the feathers to the base and work your way up. Only put glue on the tops of the feathers. This lets the rest of the feather pop out, for a 3D look.


Step Three:

• Choose and cut out your felt for your back feathers. ( About 20)

• Once again start at the base and work your way up. Almost to the top. You'll still be able to see some Styrofoam and that is ok!


Step Four:

• Next cut out your felt for the headpiece ( a triangle), Ears ( folded triangles), A beak ( triangle) , Eyes ( circles).

• Glue on is this order. Beak first, Than Ears, Eyes, and last the head piece.


Step Five:

•Lastly add the googly eyes, and viola! You have yourself a very cute owl! 


This is my son's owl ( Princess). Gah! So cute ♥


Happy Crafting!! Whoooo ever you may be!
~Sy


Saturday 31 March 2012

Homemade Playdough


I searched high and low..made a few mistakes..and this is it!! So stop your searching..and use this recipe!♥ 


Skill Level - Easy & Quick!

You Will Need:


1 cup white flour
1/2 cup salt
2 tablespoon cream of tartar (find it in the spice section)
1 tablespoon oil
1 cup water
food coloring


Step One:

• Add your first four ingredients to your pan


Step Two:

•Mix your food coloring with your water! I PROMISE this works much much better than adding it after! Zero mess!

•Add your water/food coloring to your pot and cook on medium heat for about 3-5 mins.


After about 3 mins you will see this...


This is what you are aiming for..it will get really hard to stir and become dry..it will be quite obvious that its ready to come out. 

Step Three:

• Now just work it into a ball, the more you play with it, the smoother and lovelier it gets. Store in a container or zip lock bag. Lasts a long long time. 


Enjoy! Happy Crafting!
~Sy


Saturday 10 March 2012

Easy Chocolate Suckers

My Son's fifth birthday is just around the corner ..so the hunt is on! Looking for games, prizes, cupcake ideas..trying to find the most affordable way to do things is tough!


These are PERFECT party favors! Very reasonable as well. It cost me roughly $11.00 to make $40.00 !

Skill Level: SO easy! 

You Will Need:

• Sucker Sticks
• Chocolate Wafers
• Chocolate Sucker Mold
• Clear Plastic Bags & Ribbon


Step One:

•Melt your chocolate in the microwave. Melt in 30 second increments, stirring often. 


Step two:

• Pour your chocolate into your mold, as close to the top as you can without it spilling over.
•After pouring, gently tap your plastic mold down onto the counter to level out the chocolate.


Step three:

• Place in sticks and roll them so that they are really in ( and coated) with chocolate.


Step four:

•Place in freezer for 10 mins.
• Take out and Viola! You've got yourself a sucker!


Step five:

• Place in clear plastic bags, and tie with Ribbon :)


Viola!
~Yummy
Happy Crafting
~Sy