Pages

Wednesday, 4 January 2012

Button Tree

Eek!! How sweet is this?! And it literally takes no time at all! In two easy steps you can have yourself a beautiful picture to hang on your wall! 


Skill Level: Very easy !

You'll need:

•A canvas
•White shimmering buttons ( green or pink would look nice as well)
•Glue Gun
•Brown paint & Paint brush


Step One:
•Paint your tree ( it's easier then it looks, trust me!)
Let it dry :)


Step two:

•Add your buttons
I placed all mine first..and then went back and glued them down. 
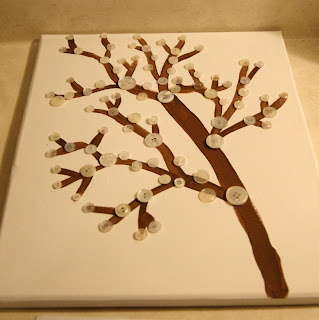


Viola! Your tree is complete!
I'll be making another one with Green buttons as a gift for a friends birthday in February.
I hung this on my wall at home, and it looks SO neat! I LOVE how it shimmers!


Happy Crafting!
~Sy


Tuesday, 3 January 2012

Button Frames

I love love love this craft!! So much in fact that I will be hosting a small gathering of ladies over later this month, to show them how to do it!

What's great about this is that you can customize your frame to suit any occasion, any room.. possibilities are so endless and so fun
!


Skill Level: Easy!! ( isn't everything I do easy? lol)

You'll need:

 • Wooden Frame
 •Buttons!
 •Your choice of picture
 •Glue Gun


Step One:

• Choose your buttons!
My friends oldest daughter just re-did her room in hot pink, with Zebra accents. So I chose White, Black with...you got it..hot pink buttons! 


Step Two:

•Put your picture in your frame and begin adding your first layer of buttons.
( A special thank you to Jennifer Donnelly of Donnelly Photography for the beautiful photograph)
Find her on Facebook here:
 http://www.facebook.com/pages/Donnelly-Photography-Red-Deer-Photographer/170747042955427


Step Three:

• Start layering your buttons, just place them where there are gaps or it just looks nice!


Step Four

•Add your finishing touches, in this case for me it was tiny touches of hot pink!
Viola you've done it! Turned a boring old frame into something super cute!


I liked it so much that I did one more!! I even made a button flower ♥
Me & my son ♥


Happy Crafting!
~Sy


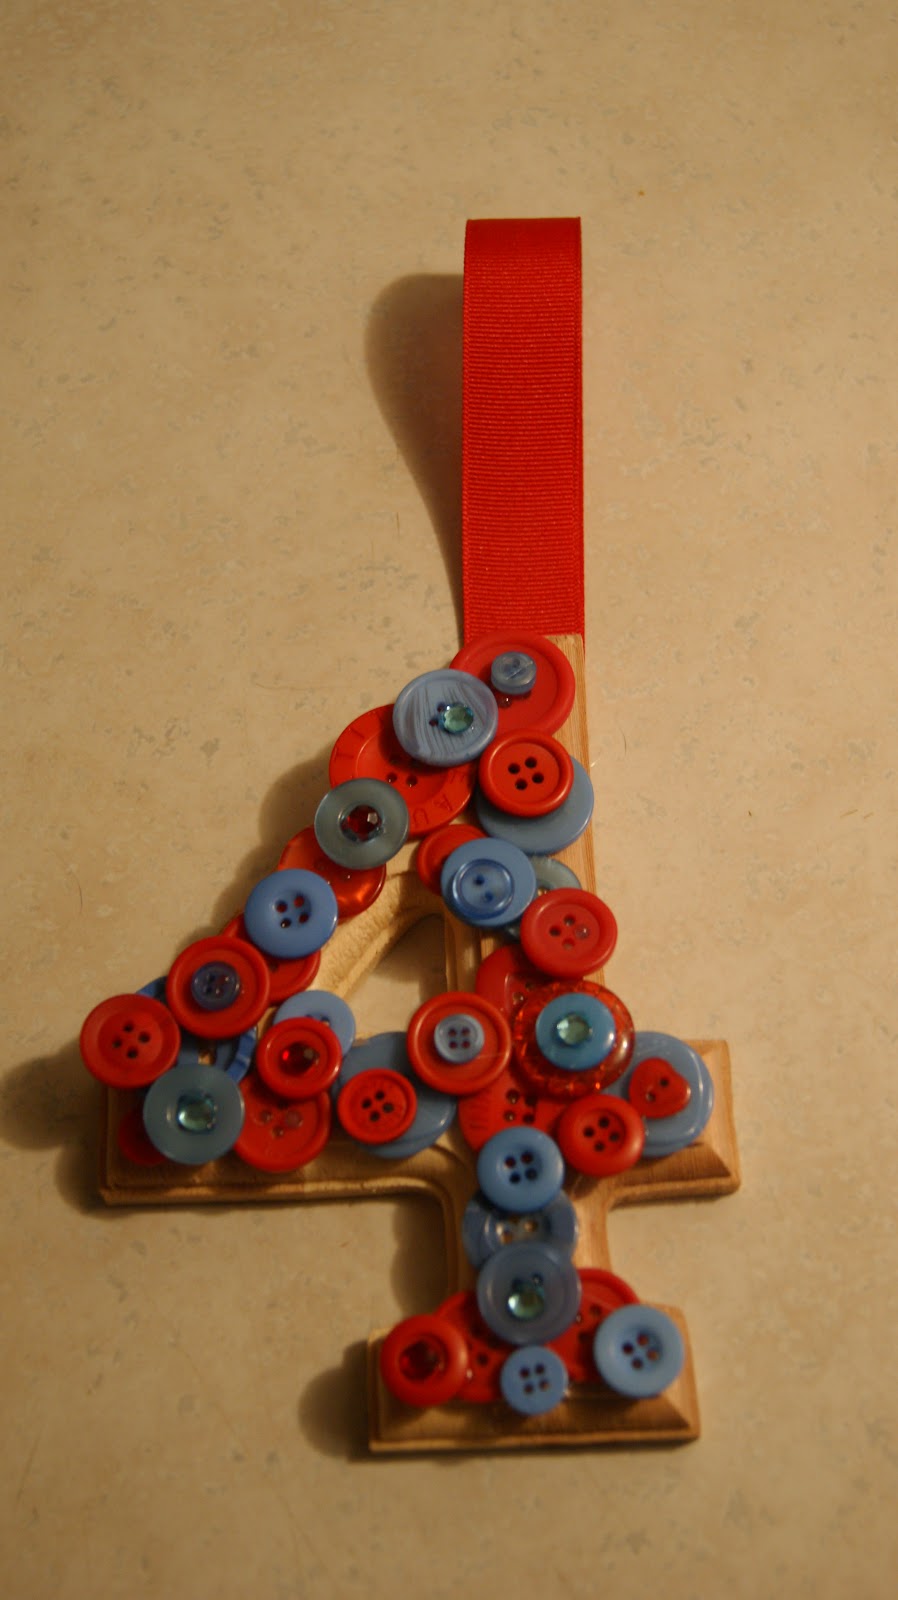
Button Numbers

Happy New Year Everyone! I'm looking forward to a nice long year of crafting!

I was lucky enough to get a jar of buttons for Christmas from my best friend in Alberta! So there will be a few button tutorials coming your way! The BEST thing about button crafts is that you literally can't mess them up, they always look charming and sweet!! :)


Skill level: SO super easy!!


What you'll need:

• Wooden number
• Buttons of your choice
•Ribbon
•Glue Gun

Step One:

•Pick out your buttons
Since this special number four, was for my Son's room, I let him pick out the colors he wanted.


Step two:

• Start gluing your buttons all over your wooden number


Step Three:

•After the first layer of buttons is finished, start filling in spots and layering some of the buttons.


Step Four:

• Glue your ribbon onto the back so you can hang it up! I also added little matching gemstones :)


All hung up on his wall!


Happy Crafting in 2012!
~Sy


Wednesday, 14 December 2011

5 minute gift bags!

Skill Level- So super easy!

 Once again we come back to recycling Christmas cards! They are just too lovely to throw in that Recycle bin! So here is a simple,  quick way to make something "old" into something new!  Best of all..they are so fast to make!

 I used mine for my baking exchange goodies! What will you use yours for? 


You will need:

•Brown Paper bag
•Ribbon
•Old Christmas cards ( the front)
•Hot Glue ( Regular glue would work as well!)
•Hole Punch ( optional)


Step One:

Cut out your Christmas card to your liking, and hot glue it to the front of your bag ( closer to the bottom)


Step two:

•Fold the top of your paper bag over once, and then hole punch ( or poke) two holes in it.


Step Three:

•Thread the ribbon through the back, then tie into a loose knot, or a bow! Viola! A sweet homemade gift bag ♥ 


Happy Crafting~
~Sy


Friday, 9 December 2011

Christmas Eve Plates


Skill Level: Easy! 

Want a special plate for your children to put out for Santa? Well here's the instructions on how to do one! Quick, easy and makes a great keepsake <3 


What you'll need:

•A white porcelain plate
•Paint pens! ( I grabbed mine from the local craft store, they are called Porcelaine Writers. Make sure that the pens you are getting are made for writing on glassware, plates etc)


Step One:

•Begin by outlining what you want on the plate. For example I put "Cookies to Santa" across the top. Then I added a snowman, tree, and reindeer. Let your imagination run wild!


Step two:


•Next you'll want to add color , where you want it. I filled in the reindeer, added some color to the snowman, and filled in the tree.


Step Three:

•Next you'll fill out the bottom of your plate. Write a short letter to Santa! Then polish it off with your child's name, or a pet's name even!

•Don't forget to add some snow up at the top!!

•Make sure to follow the directions on your pens about drying/baking times. Mine say to let dry for 24 hours, and then bake at 150 for 35 mins. 


Happy Crafting!
~Sy


Thursday, 8 December 2011

Christmas Card Wreath

While decorating for Christmas this year..I realized that I have almost an entire box of old Christmas cards, that I just refuse to part with! Recycling them just seems so unjust! They are all so beautiful and sparkly! So here is my idea on a different way to recycle!


Skill Level: Easy! But time consuming!! 

You will Need:

•Old Christmas Cards
•Red Ribbon
•Styrofoam Circle
•Hot Glue Gun
•Toothpicks
•Scissors 


Step One:

•Trace out a holly leaf shape onto your cards. Trace and Trace and Trace..until you are sick and tired of it..and then trace some more!!

•Then cut out your holly leaf shape. Cut and Cut and Cut..until your fingers start to cramp..then cut some more!


Step two:

•Hot glue tooth picks onto the back of each cut out leaf. Glue and Glue and Glue...
 I told you..easy..yet time consuming!


Step three:

•Poke your tooth picked leafs into the styrofoam on an angle. ( So that just the front of the card is showing.)
Poke and poke and poke and poke!! 


Step Four:

•Add ribbon to the top ( a loop for hanging) and the bottom of your wreath.
I just made the bow and hot glued tooth picks on and stuck it in!! Super easy and adjustable too!

•This craft can be super frustrating because it is so tedious, but keep at it! It's beautiful and makes a really special gift <3 


Happy Crafting!
~Sy


Thursday, 1 December 2011

Cookie Cutter Ornaments! No Glue required! :)

Skill Level: Easy as Cookies..I mean Pie!

Want a calorie free way to use your cookie cutters this year? Have I ever got the craft for you! Simple, quick and soooo cute!


You'll need:

•Scrapbook Paper or Pictures
•Foam
•Ribbon
•Cookie cutters ( Metal or plastic will do)
•pen for tracing
•scissors

Step One:

• Trace around your cookie cutter onto the foam


Step Two:

•Trace around your cookie cutter on your picture or your scrapbook paper 


Step three:

•Cut out both pieces and you should have this


Step Four:

•Push your picture or scrapbook paper into the cookie cutter, right to the front.
•Then push your foam in snug up against the picture ( this will keep your picture from falling out.)


Step Five:

•Using your finger push both the foam and picture out just enough to slide a ribbon through.
•Tie a knot on the ribbon and the push the picture and foam snug into place. ( the knot should not be visible from the front of the ornament.)


Ta Da!! You now have an adorable Ornament!

Thanks to Kelly and Colin for the use of their little guy in the snowman ornament, and a Thank you to Nicci and Ryan for the use of their little baby whose picture is in the Stocking. <3 Of course a thank you to my little guy for being so cute!! ( in the bell)


Happy Crafting!
~Sy