Pages

Friday, 27 April 2012

Sweet Felt Owls ♥

These sweet little owls are not only easy to make, but they are sure to melt your heart! I have mine sitting up on my dresser and I love seeing them everyday! My five year old also loved making one, and he had a lot of fun with it. 

Skill Level: VERY easy!! ( For my child, I let him pick his colors etc, but cut out the pieces and let him use white glue.)

You Will Need:

• Styrofoam Balls ( Big or little)
•Different colors of felt
•Googly Eyes
• Hot or White glue
•Sharp Scissors


Step One:

•Cut out a circle of felt and glue it to your ball. This will be the bottom/base of your owl
.


Step Two:

• Choose your felt for your tummy feathers. Cut out in feather shape. ( think tear drop or leaf) I'd say 15 or so. You can always use more if you need to.

•Begin by gluing the feathers to the base and work your way up. Only put glue on the tops of the feathers. This lets the rest of the feather pop out, for a 3D look.


Step Three:

• Choose and cut out your felt for your back feathers. ( About 20)

• Once again start at the base and work your way up. Almost to the top. You'll still be able to see some Styrofoam and that is ok!


Step Four:

• Next cut out your felt for the headpiece ( a triangle), Ears ( folded triangles), A beak ( triangle) , Eyes ( circles).

• Glue on is this order. Beak first, Than Ears, Eyes, and last the head piece.


Step Five:

•Lastly add the googly eyes, and viola! You have yourself a very cute owl! 


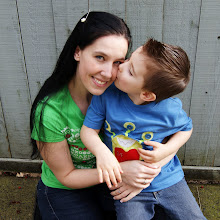
This is my son's owl ( Princess). Gah! So cute ♥


Happy Crafting!! Whoooo ever you may be!
~Sy


Saturday, 31 March 2012

Homemade Playdough


I searched high and low..made a few mistakes..and this is it!! So stop your searching..and use this recipe!♥ 


Skill Level - Easy & Quick!

You Will Need:


1 cup white flour
1/2 cup salt
2 tablespoon cream of tartar (find it in the spice section)
1 tablespoon oil
1 cup water
food coloring


Step One:

• Add your first four ingredients to your pan


Step Two:

•Mix your food coloring with your water! I PROMISE this works much much better than adding it after! Zero mess!

•Add your water/food coloring to your pot and cook on medium heat for about 3-5 mins.


After about 3 mins you will see this...


This is what you are aiming for..it will get really hard to stir and become dry..it will be quite obvious that its ready to come out. 

Step Three:

• Now just work it into a ball, the more you play with it, the smoother and lovelier it gets. Store in a container or zip lock bag. Lasts a long long time. 


Enjoy! Happy Crafting!
~Sy


Saturday, 10 March 2012

Easy Chocolate Suckers

My Son's fifth birthday is just around the corner ..so the hunt is on! Looking for games, prizes, cupcake ideas..trying to find the most affordable way to do things is tough!


These are PERFECT party favors! Very reasonable as well. It cost me roughly $11.00 to make $40.00 !

Skill Level: SO easy! 

You Will Need:

• Sucker Sticks
• Chocolate Wafers
• Chocolate Sucker Mold
• Clear Plastic Bags & Ribbon


Step One:

•Melt your chocolate in the microwave. Melt in 30 second increments, stirring often. 


Step two:

• Pour your chocolate into your mold, as close to the top as you can without it spilling over.
•After pouring, gently tap your plastic mold down onto the counter to level out the chocolate.


Step three:

• Place in sticks and roll them so that they are really in ( and coated) with chocolate.


Step four:

•Place in freezer for 10 mins.
• Take out and Viola! You've got yourself a sucker!


Step five:

• Place in clear plastic bags, and tie with Ribbon :)


Viola!
~Yummy
Happy Crafting
~Sy


Wednesday, 7 March 2012

More Canvas Button Art ♥

I thought I would throw out a few ideas out there for people who have been wanting to try button art! Here are two new creations that I came up with. 

Now you can use this link to my previous button art if you are wondering how I did it.
http://craftysy.blogspot.com/2012/02/canvas-button-art.html

This two are both made from canvas that is brought at the dollar store (5x7 size). And took about 45 minutes each to make.

This one reminds me of Spring! Which I so desperately miss!


This one is my button Owl. Both my Bf and my son just love him.


Happy Crafting!
~Sy

Saturday, 3 March 2012

A piece of cake!

I quick thank you Cake by Alana for such a fabulous cake!! Not only was she beautiful to deal with, she made my dream cake a reality. It was by far the most tasty cake any of us have ever had!! Highly suggest using Alana for your dessert needs! 

http://cakebyalana.blogspot.com/


Happy Birthday!! ( Thanks Alana!)
~Sy

Birthday Bash at the Crafty Cuppa ♥

What does a gal like Crafty Sy do on her birthday?! Something "crafty" of course!


 If you are living in British Columbia or even just visiting the area I HIGHLY suggest swinging by The Crafty Cuppa in Chemainus.


Their staff are amazing, informative and very thoughtful. The place is clean and bright with a friendly feel to it! Kid friendly as well!


This is what the Crafty Cuppa is all about..

- Pick out your ceramic! They have OODLES and I mean OODLES of things to choose from. Everything from mugs, to dishes, cute little ornaments..something suitable for everyone ( Prices are VERY reasonable!)

-Paint your heart away. There is every paint color and paint brush..you'd ever need!! Not to mention magazines to help you with ideas! Stencils are available as well! The paint is completely child and clothing friendly!

-When you are finished they kiln your masterpiece for you, and you can then pick it up at a later date. ( Roughly a week) Then its ready to go, and will safely last a long long long time.

This is a place you need to check out!!!! (So I'm giving you the link for more information)

http://www.thecraftycuppa.com/Crafty_Cuppa/Home.html


This is what I chose to paint. A very intimidating monster! I will be sure to post a picture after he is put into the kiln. 


Here are my girlfriends ( pre-kilned) creations!


Happy Crafting!
~Sy


Sunday, 26 February 2012

Clothespin Ribbon Art Holder ♥

If your child is anything like mine..he/she LOVES to draw. My son is constantly making art, my fridge is covered , my magnet board is covered...what next?

This Clothespin Ribbon craft is a great way to show off all their art in a very unique way. Clothes pins are also great for itty bitty chubby hands so your child will be able to hang their items where they want as well. ♥


Skill Level: Medium

You Will Need:

•Ribbon (the medium thick ribbon will work the best )
•Hot Glue
•Tacks or Sticky Tack
•Small Wooden Letters ( I find mine at Walmart for $1.00 a bag)
•Clothespins (Walmart for $1.97)
•Paint/Brush


Step One:

•Begin by measuring the approx amount of ribbon you will need by wrapping it around the clothespin. Then cut the amount of strips you will need. ( I did 12)

•Next start by putting a small amount of glue on the tip of the clothespin..continue gluing and laying down your ribbon as you go around. 


Step Two:

•Now lets work on our letters, I painted mine brown to match my ribbon! Mine took two coats :
)


Step three:

•Once your letters are dry glue them to your clothespins! 


Step Four:

• Place your ribbon on the wall ( I used sticky tack on the back of my ribbon ends, and my clothespins and it's held VERY well)


Viola! Easy to make, and looks really sweet!


Happy Crafting
~Sy