Pages

Tuesday, 29 November 2011

Holiday Button Wreath

Skill Level- Easy!!

 Button crafts make me entirely WAY too happy! They are so easy, and SO much fun! I have oodles of more button crafts in mind so stay tuned for more fun tutorials!


You will need:

•Glue Gun
•Green Buttons ( all different shades is okay!)
•Red Buttons
•Red Ribbon
•Two container for tracing ( one bigger and one smaller)
•A yellow or light colored crayon
•Frame ( without glass)
•White card stock


Step One:

• Start by picking out your buttons and separating  them into two piles.


Step three:

• Now its time to trace out your wreath on the card stock. Use a light colored crayon or pencil and trace your big circle first.


Step four:

•Now trace your smaller circle.


Step Five:

 •Begin hot gluing your buttons onto your wreath. Make sure they are snug up against each other, but don't be too concerned with little spaces. *Do not glue buttons into the center of your wreath*


•When you are finished you will have something that looks like this!


Step six:

•Now we'll fill in the gaps, we will do this by gluing buttons OVER the holes in the wreath.  It also will give our wreath a really neat 3D look!


Step Seven:

•Add your red buttons randomly around the wreath. 


Step Eight:

•Take your red ribbon and tie a big bow, then glue it onto the top of your wreath ( just above the buttons)


Step Nine:

•Cut out a square around your wreath. The size you cut will depend on the frame you are using :)
•Pop your picture in the frame, to make mine more sturdy I actually put the glass behind my picture before placing the backing back on.


Happy Crafting!
~Sy


Monday, 28 November 2011

Vinyl Lettered Ornaments

Skill Level- Medium

These are just beautiful!! Pictures do not do them justice!! And just think of how many ways you can personalize them! I made just over thirty of them, all different and all very pretty! Let your imagination go wild, and have fun!


You will need:

•Glass Balls ( any size will do!)
•Vinyl letters
•Ribbon
•Fake Snow
•Self adhesive gem stones


Step One:

• Apply your larger letter to the front of the glass ball. ( Today I am doing a "TOPS" ornament, which is a non profit weight lose group that I belong to.) 


Step two:

•Add your black lettering ( or a contrasting color) straight across your first letter.


Step three:

•Remove the top of the ornament and spoon in your fake snow. ( I got glittery snow, and it looks so pretty)
•Give your ornament a nice shake after you put the top back on :)


Step Four:

•Add your ribbon! I usually cut out anywhere from two pieces of ribbon to five. It all depends on the size of the ball and what I think looks the best! Tie your ribbon using a basic knot, after threading it through the top of the ball.

•Add your gemstones! I chose in this case to just put them on the "T", but I have done it all different ways and it looks so beautiful! OR add no gemstones at all , which looks fabulous too!


Here is an example of a fully gem stoned name!


• This is an example of using no gemstones (the year was also added in vinyl letters)


And an example of a little glass heart. With just a first initial. I did ten of these for my son's preschool friends for school this year.


Happy Crafting!
Sy


Friday, 25 November 2011

Fingerprint Snowman Ornaments

Skill Level- Easy!

This snowman ornament is the perfect gift for a teacher, parent, or grandparent..or loved one! 


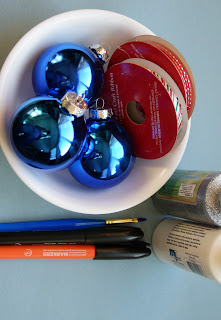
What you'll need:
• A willing child(ren)
•Small Blue Glass Balls
•White poster paint
•Black & Orange Permanent Markers
•Ribbon
•Silver Glitter Glue


Step One:

•Find your willing adorable child 


Step two:

•Paint fingers and thumb white 


Step three:

•Get child to firmly grasp ball. You can also do each finger separately.


*Remember to wash all the paint off your little ones fingers♥


Viola! Snowman :)


Step four:

•Paint a snowbank on the bottom of the ball for the snowman to sit on.


Step Five:

• Let Dry ( Takes about 10-15 minutes)
•Using permanent marker draw hats, arms, eyes and noses! ( I also marked the year and his initials on either side of the snowbank )


Step six:

•Brush silver glitter glue over the snowbank, this really makes them glittery on the tree! 


Step 7:

•Let glitter dry ( about 10 minutes)
•Tie ribbon onto the ornament. I have experimented and I think two different colors looks the best . I knot one, and just let it hang..and then tie the other into a bow <3
•Add an ornament hook, and you are ready to go!


Happy Crafting!!
~Sy


Thursday, 24 November 2011

Reindeer Foam Ornaments

(Skill Level- Easy Peasy!)!

This cute little reindeer ornament is sweet to hang on your tree,  and is so easy that making multiples takes no time at all! *Replace the hot glue for white glue, and let your children join in the fun!*


                                                                       What You'll Need 


•Glue Gun
•Scissors
•Goggly Eyes 
•Itty Bitty Pom Poms (Black & Red)
•Brown Foam
•Ribbon 


Step One:
Cut out the three pieces you'll be needing.
•The head is like a chubby heart, just round the point.
•The antlers are the shape of mittens!


Step Two:

•Put a small amount of hot glue onto the back of each antler and stick them onto the top of the head.


Step Three:

•Put a small amount of glue onto the back of each eye and stick them just below the antlers


Step Four:

• Put a small amount of glue onto the pom pom and stick it right underneath the eyes.


Step Five: 

•Take a piece of ribbon and tie a little bow, cut off the extra on each end. Dab a small amount of glue on the back of the ribbon and place it right above the eyes, where the antlers touch.


Step Six:

•Knot and add another piece of ribbon to the back with a small amount of glue.


Step Seven:
•Now your little reindeer is all ready to hand on your tree!!


Enjoy your crafting!
~Sy